

If you've ever stepped outside to grab a glass of water for your plants only to find a puddle around your garden pump, you know how frustrating a leak can be. I've been selling garden pumps for years (I run a small supply shop that's been around since 2012, so I've seen every leak under the sun) and let me tell you-most of these issues aren't because the pump is "broken for good." A lot of the time, it's a quick fix that saves you hundreds of bucks on a new unit. Whether you've got a Cast Iron Garden Pump, an Electric Garden Water Pump, or another model, let's walk through how to track down the leak and fix it without calling a pro.
First, let's start with the basics: before you do anything, turn off the power (if it's electric) and turn off the water supply to the pump. I can't stress this enough-water and electricity don't mix, and even a small jolt from a half-connected wire isn't worth it. If your pump is submersible, pull it out of the water first (obviously, make sure it's unplugged before you reach in). Most leaks happen in two spots: the pipes connected to the pump, or the pump's internal seals and gaskets. Let's break down both, step by step.
Leaks at the Pipe Connections
This is the most common leak I see, especially with people who do their own plumbing without a helper. When you connect hoses or rigid pipes to your pump, there are a few things that can go wrong here.
First, check the thread seal. A lot of gardeners skip this part, or use old Teflon tape that's dry and crumbly. If you unscrew the pipe from the pump's inlet or outlet, look at the threads on both the pipe and the pump. If the Teflon tape is cracked, or if you used pipe dope that's too old, that's a surefire leak. How to fix it? Unscrew the pipe completely, clean the threads with a rag to get rid of old sealant, then wrap new Teflon tape around the male threads (the ones on the pipe, not the pump) clockwise-wrap it tight, and don't overlap too much, or you'll get lumps that block water flow. If you're using a rigid PVC pipe instead of a hose, make sure you glued it correctly last time; sometimes the glue doesn't set all the way, so if you twist the pipe, it can separate a little and leak.
Another thing: loose clamps. If you're using rubber hoses on the pump's outlet (like for a sprinkler system), the metal clamps that hold the hose on can work loose over time from vibration. I've had customers bring in a pump that's leaking just because the clamp was finger-tight-when the pump runs, it shakes, and that clamp comes undone. To check this, turn off the power and water, wiggle the hose where it connects to the pump. If it moves, the clamp is loose. Grab a screwdriver or a wrench (whatever fits the clamp) and tighten it-don't crank it so hard you crush the hose, just enough that it doesn't move anymore. If the hose itself is cracked, you'll need to replace it, not just tighten the clamp. I keep extra hoses in stock at the shop, so if you're in a pinch, stop by.
One less obvious spot here is the foot valve, which is the part of the pipe that sits in your well or pond if you're pumping from a source below ground. A lot of people forget about the foot valve, but if it's leaking, it can make the pump work harder and cause the connection to the pump to leak too. If you suspect the foot valve is the issue, pull it out of the water and check for cracks or debris stuck in it. Clean off any leaves or dirt, and if it's cracked, replace it-this is a small part, but it makes a huge difference.
Leaks in the Pump's Internal Parts
Okay, so if the pipes are all tight and the connections are good, the leak is probably inside the pump. This is where things get a little trickier, but still doable if you're comfortable with basic tools. The most common internal leak spots are the mechanical seal, the gasket between the pump housing and the motor, and the impeller.
First, the mechanical seal. This is a small, circular part that sits between the pump's motor and the pump's "wet end" (the part that moves the water). Its job is to keep water from getting into the motor, and to keep water from leaking out around the shaft. Over time, this seal can wear down from friction, or get damaged if there's dirt or grit in the water (especially if you're pumping from a pond without a filter). If you see water leaking from the base of the motor, where the shaft comes out, that's almost always the mechanical seal. Replacing it isn't too hard, but you need to make sure you get the right size for your pump. I have a whole range of Garden Peripheral Pumps and other models, so if you're not sure which seal you need, send me a pic of your pump's label and I can point you to the right part.
Next, the gasket between the pump housing and the motor. This is a thin, rubber or paper ring that creates a tight seal between the two parts. If this gasket is dried out, cracked, or has a piece missing, water will leak out between the motor and the housing. To fix this, you'll need to take the pump apart: first, remove the bolts that hold the motor to the housing (make sure to label them if they're different lengths, so you put them back in the right spots). Pull the motor away, scrape off the old gasket material with a flathead screwdriver (be careful not to scratch the metal housing), then put a new gasket in place. You can get these gaskets at most hardware stores, or if you're using a Garden Jet Pump, I stock exact replacements at the shop.
The impeller is another possible issue. The impeller is the fan-like part inside the housing that pushes water through the pump. If it's cracked, or if there's something stuck in it (like a small rock or a leaf), it can cause the pump to lose pressure and leak. To check the impeller, you'll need to take off the pump's housing cover (again, remove the bolts), pull out the impeller, and inspect it. If it's clean and intact, put it back in. If it's cracked, or if it's worn down (the blades are smooth instead of sharp), replace it. I recommend replacing the impeller every 3-5 years if you use your pump regularly, just to prevent issues.
Special Cases: Submersible and Cast Iron Pumps
Wait, let's talk about two popular models I sell a lot: Garden Submersible Pump and the cast iron garden pump, since they have a few unique leak issues.
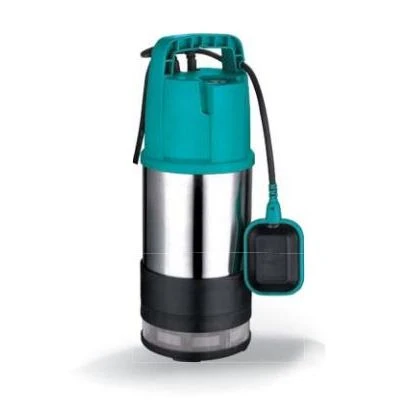

For submersible pumps: most of the time, leaks here are either in the power cord or the seal around the cable feed. If the cable gets damaged from being dragged along the bottom of the pond, water can seep into the cord and cause a leak (and that's a safety hazard). If you see a leak around the cable, turn off the power immediately. You can wrap the damaged part with waterproof electrical tape, but if the damage is more than an inch or two, replace the cord. Alternatively, the seal around the cable feed (where the cable enters the pump housing) can wear out-you can replace that rubber seal with a new one from the shop, it's super cheap and easy to swap.
For cast iron garden pumps: cast iron is durable, but it can rust over time, especially if it's stored outside in the winter (which you shouldn't do, by the way-drain the water and cover it). Rust can create small cracks in the pump housing, which will leak. If you see a rust spot on the housing, don't panic. Sand down the rust with sandpaper, clean the area, then apply a metal epoxy putty (like JB Weld) to seal the crack. Let it cure completely before you use the pump, and it should hold. If the crack is big, though, it's probably easier to replace the pump-my cast iron models are built to last, but even the best ones can't handle a huge rust crack.
When You Need to Call a Pro (or Why Replace It Anyway)
Now, I know some of you will look at these steps and think, "That's a lot," and that's okay. If you're not comfortable taking apart your pump or dealing with water and wires, don't risk it-call a local pump repair person. But before you do, check a few things first, because a lot of pros charge a fee just to show up, and most of the time, it's a quick fix they could tell you over the phone.
That said, sometimes replacing the pump is the better option. If your pump is more than 10 years old, and it's leaking from multiple spots (not just one connection), it's probably worth buying a new one. I sell a variety of models, so if you're in the market, I can help you pick the right one for your garden size and water source. For example, if you have a small garden and a shallow well, the electric garden water pump is perfect; if you have a deeper well, the garden jet pump will give you the extra pressure you need.
Final Quick Tips to Prevent Future Leaks
Once you fix the leak, you don't want it coming back. Here are a few habits I tell all my customers to keep their pumps in good shape:
- Drain the pump and hoses before winter, especially if it's not frost-proof. Water expanding when it freezes can crack the housing or pipes, which leads to leaks.
- Clean the strainer on the intake every few months. If dirt or leaves get into the pump, they can damage the impeller or seal, causing leaks.
- Check all connections every spring, before you use the pump for the first time. Vibration from being unused all winter can loosen clamps or cracks pipes.
- Use a filter if you're pumping from a pond or a dirty water source. It will keep debris out of the pump and prevent internal damage.
If you've tried these steps and the leak is still there, or if you want to upgrade your pump to one that's more reliable, feel free to reach out for a consultation. I don't just sell pumps- I help people pick the right one for their needs, and I can walk you through any repairs if you're ready to try. No sales pitch, just honest advice.
References
- Garden Pump Maintenance Guide, Irrigation Association, 2021
- "Common Leak Issues in Home Garden Pumps," Water Gardens Magazine, Vol. 18, No. 3, 2020
- Mechanical Seal Replacement for Residential Pumps, Pump Industry Association, 2022